Live Twitter Feed
Blog Index

Entries in how to (7)

Tuesday
Oct282014

Opening the TAP Bag Tips

There is an art to opening the sealed end of your TAP bag. The Sealing Tape is designed to be extremely tacky to prevent air from leaking out, so it can take some force to get it reopened. Too much force, and you risk ripping the seams on the edge of your bag. When opening the bag, it is important to start in the middle of the sealed end and work your way out to the edges. You also want to do your best to keep the Sealing Tape on one side of the bag as opposed to breaking apart onto both sides.

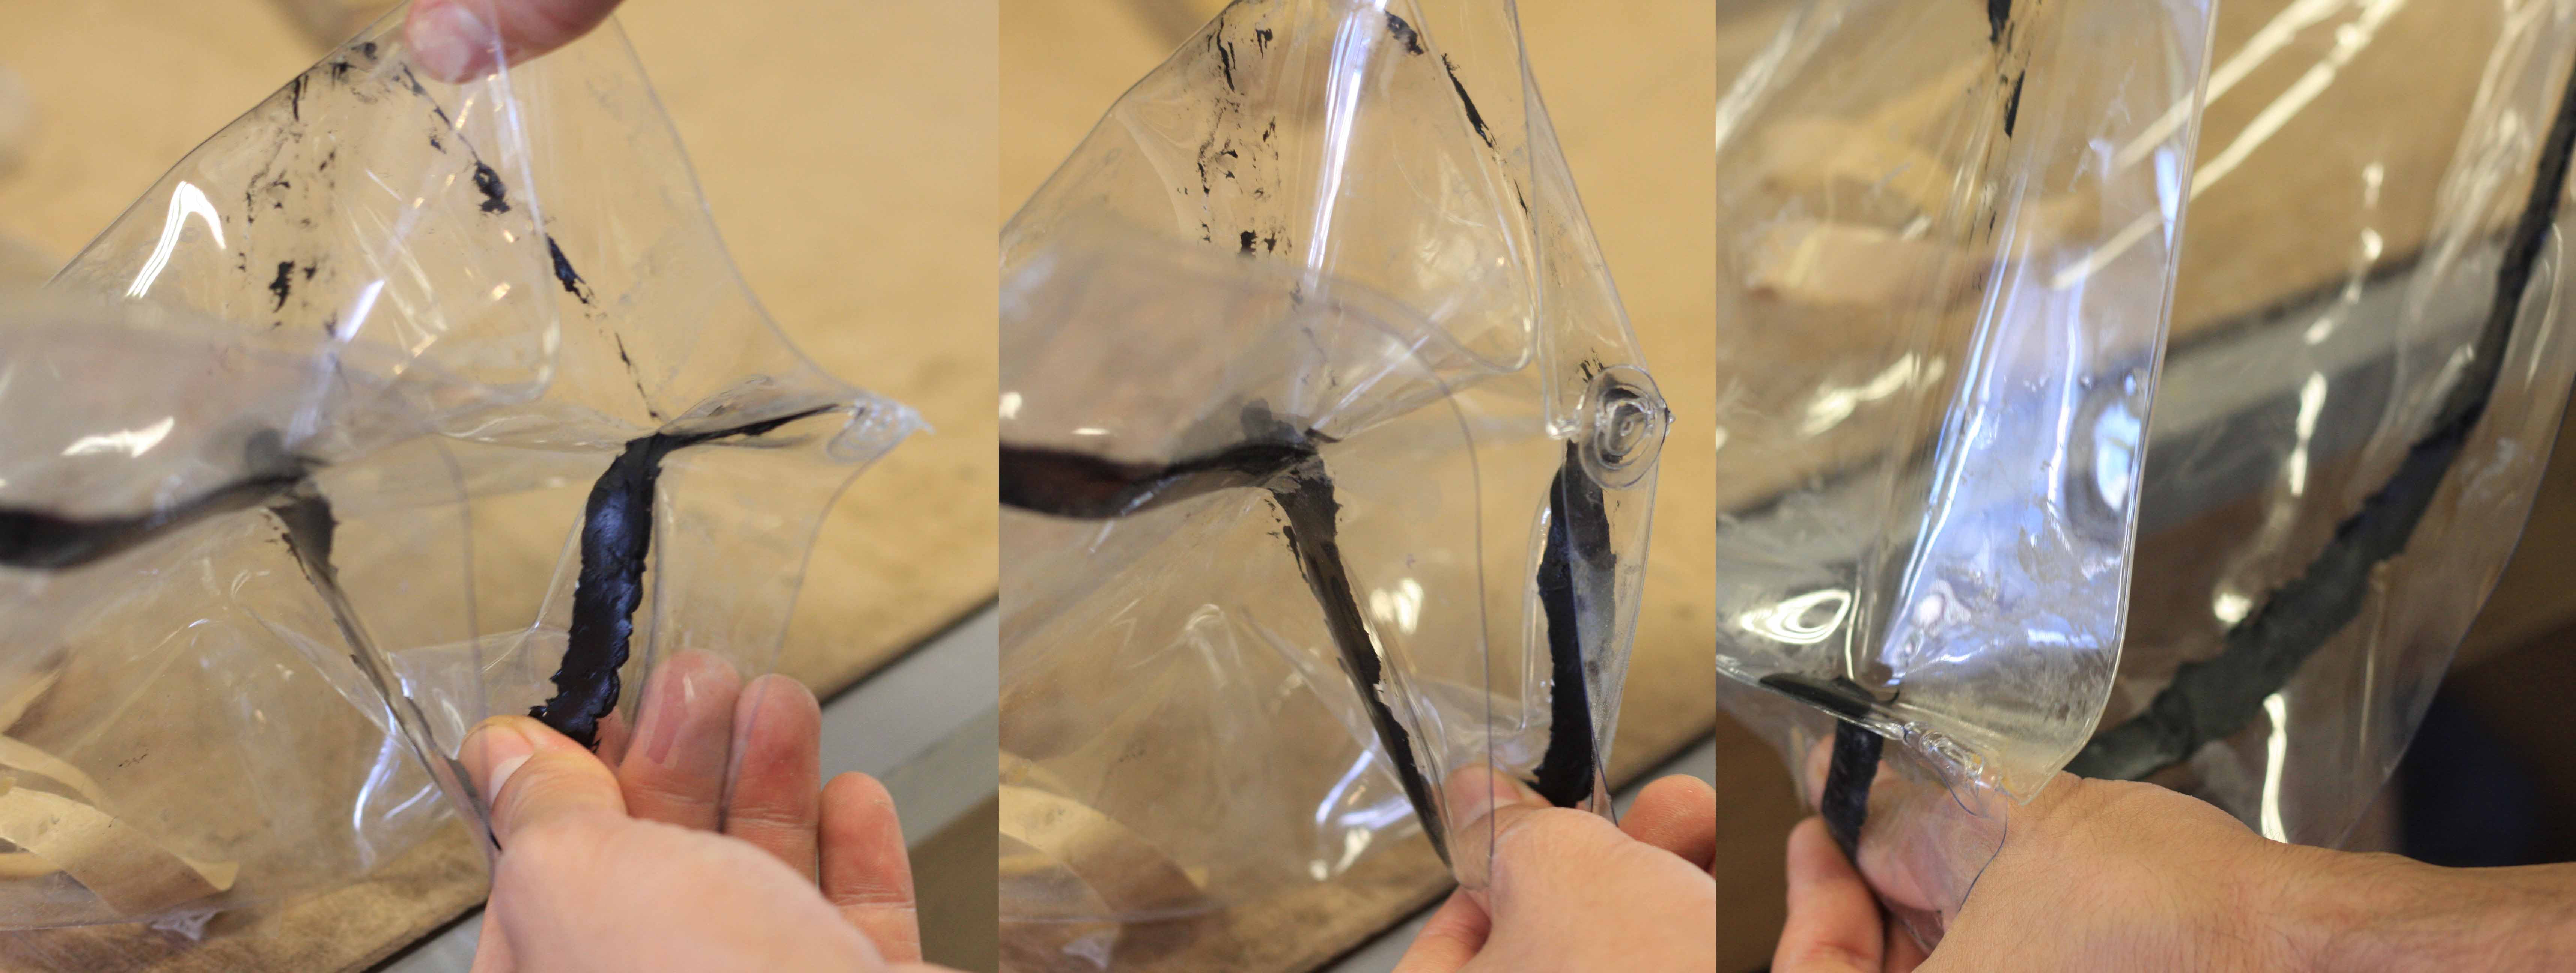
The best way to do this is to break the middle of the sealing tape length with your thumb, and work your way to the edges of the bag. Do your best to keep the Sealing Tape on one side of the vinyl, but if there is still some stuck to the other side it is okay.  

Below is another great way to open up the sealed end of your TAP bag using a marker! This method was developed by one of the students from the Oasis Skateboard Factory and has been passed along to other students and builders. 

Monday
Oct272014

Breather Netting Tips

The length of Breather Netting provided with the Thin Air Press vacuum bag is used to prevent the valve from sticking directly to your project, and allows for even evacuation of air when using the hand pump. Without it, the opening on the inside of your grey valve where air is drawn out of will get blocked by your project and will prevent the pump from pulling out any air from the bag. Extending the length of breather netting to the far ends of your bag will also help make sure all air is drawn out easily.

Depending on the kit, you will usually get either 4' or 6' of netting, which is more than enough for any project. Once your project is inside the bag, place your Breather Netting directly under the valve.

The job that the Breather Netting does can be achieved with different materials in a pinch. If you cannot find your length of netting while pressing up a project, you can use something porous like a cloth or even a sock to help the air evenly evacuate. 

Many builders over the years have also asked us about the difference between the Red and Black netting we supply. Truth be told, it is the exact same stuff. So don't be concerned about receiving a different colour length than you may have worked with in the past.. we just like to change things up every once in a while ;)

Thursday
Oct162014

Clamping Tips

If you plan on using any external clamps for a project in your Thin Air Press bag, make sure to use rounded or padded blocks in between the clamp and the vinyl of your bag. This helps prevent the metal clamp ends from damaging your bag or putting unneccessary stress any one spot. 

A great example of this is the common practice of using clamps to help achieve a super tight bend in a drop deck. By applying clamps to a block that runs along the apex of your drop bend, it can really help ensure a strong lamination in these areas. 

Notice how the blocks are placed on the outside of the bag with only the nicely rounded edges making contact with the bag. This will help prevent unnecessary force being applied directly to the bag itself.

You can make blocks like this using a variety of materials. Anything that will provide some relief between the metal and vinyl should help prevent your bag from getting damaged. 

This method can also help with bending concave

Wednesday
Oct152014

Veneer Prep Tips

Worst case scenario when working with your Thin Air Press vacuum bag is that you will get a hole or tear in the vinyl of your bag. While you can always fix a hole (video below), one of the best ways to prevent it from happening is to make sure the project you are pressing doesn't have any sharp edges or splinters.


Always be aware of material that could puncture the bag, on veneer sheets this is usually tiny splinters or sharp corners. Take a bit of time before pressing to sand these areas down and it will go a long way towards the longevity of your bag.

Check the edges of your veneer as well as they may have a sharp edge or splinters just waiting to tear your bag when you slide the project into it. Simply use a sharp utility knife and a ruler to cut the edge straight.

Jeremy from Boomstick Boards even showed us this great little tip where he actually cuts the corners of his veneer sheet on an angle before pressing.


Tuesday
Oct142014

Sealing Tape Tips

The vast majority of leaks that occur when using the Thin Air Press vacuum bag come from the sealing tape on the one open end of the bag. It is important to make sure that the sealing tape itself is free of dirt, glue and debris, and has not been compromised in any way. When you are pressing down the tape to seal the bag, look for any grey areas that indicate the sealing tape is not fully pressed down. You want a nice, uniform black colour running across the whole length of the bag, especially in the corners!

It is always a good idea to use the paper backing strip that comes with the sealing tape anytime you are putting a project in or out of a bag. That being said, it is possible to keep using the tape over and over, even with some imperfections. A little dirt isn't the end of the world, but may be a cause of a small leak in the bag. You can always replace the sealing tape if it is causing an issue.

We recommend putting the paper backing strip inside the bag when you are pressing your project as a way to not lose it.  

All of our TAP Kits come with extra sealing tape rolls to replace the original one on that comes installed on the bag. If you have used all three of the sealing tape lengths from your original kit, we do sell replacement rolls online. They can be accessed here.